網頁

2012年6月17日 星期日

one-way DFSR on Windows Server 2008 R2 (part 1 of 3)

Recently, I need to confirm DFSR function for one Project verification. Based on this necessity, I have to study DFSR mechanism on 64 bit Windows Server 2008 R2 so that build a environment for testing its function on my lab.
Drawing1The following process summary my testing steps for your reference. In this article, I will introduce the prerequisite of one way DFSR.

TMG 2010 Firewall Rule Setting
Set “Firewall Rule” from DMZ (Server with DFSR Role) to Internal (Server with DFSR Role)  for TCP:135, 445, 24158 (Custom) , 49999 (Custom)
ScreenHunter_11 Jun. 15 19.24Set “Firewall Rule” from DMZ (Server with DFSR Role) to Internal (Server with AD Role) for TCP: 53, 88, 135, 389, 5000~5100 (Custom), 50000 (Custom)
ScreenHunter_10 Jun. 15 19.24Set “Firewall Rule” from Internal (Server with DFSR Role) to DMZ (Server with DFSR Role) for TCP:135, 445, 24158 (Custom) , 49999 (Custom)
ScreenHunter_12 Jun. 15 19.25
Set static RPC for AD Logon/Directory Replication
Add Registry Key and correct value as a single port(50000/TCP). For detailed configuration, please refer to this URL as ADLogon/DirRep setting.
Open firewall port for Computer join Domain & Account logon Domain

Disable Windows Firewall
Turn off Windows Firewall on all Servers with DFSR role
ScreenHunter_07 Jun. 13 15.42
Installing DFS Replication
In Server Manager, click “Roles” ---> “Add Roles” to trigger [Add Roles Wizard]
ScreenHunter_01 Jun. 12 14.57Click “Next >” button if you have already verified the suggestion.
ScreenHunter_02 Jun. 12 15.00Enable “File Services” check box next to click “Next >” button
ScreenHunter_03 Jun. 12 15.11Click “Next >” button
ScreenHunter_04 Jun. 12 15.11Enable “DFS Replication” check box next to click “Next >” button
ScreenHunter_05 Jun. 12 15.13Click “Install” button
ScreenHunter_06 Jun. 12 15.22Click “Close”button if the installation succeeded.
ScreenHunter_07 Jun. 12 15.24So dose that it also install the DFS Management Console(dfsmgmt.msc) with MMC snap-in in the feature of Server Manager.
ScreenHunter_09 Jun. 12 15.43
Configure DFSR to a Static Port
By running the DFSRDIAG STATICRPC command on the DFSR Server as VBHV-FS-01, the DFSR RPC listening port will be forced on a static port as TCP/49999.
ScreenHunter_01 Jun. 15 18.04After finish the above activity, please remember to restart “DFS Replication Service” again.
ScreenHunter_06 Jun. 13 15.22


Set a Fixed Port for WMI
By executing the command on the console of DFSR role servers as VBHV-FS-01 & VBHV-FS-11 to set a fixed port as TCP/24158 for WMI


Until now, I have already finish the related prerequisite for DFSR. In next article, I will introduce the configure and setup DFSR mechanism.

2012年6月10日 星期日

Install Microsoft Forefront TMG 2010 (part 3 of 3)

The previous article(part 2) has already finished the Getting Started Wizard. In the moment, it will continue to run the Web Access wizard after enable check box and click “Close” button.
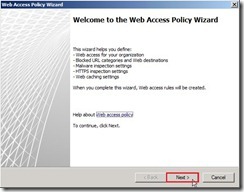
ScreenHunter_06 Jun. 02 23.10In the beginning screen, please directly click “Next >” button if you clearly this wizard will helps you define something.
ScreenHunter_07 Jun. 02 23.12URL FilteringSelect “Yes, create a rule blocking the minimum recommended URL categories” option next to click “Next >” button
ScreenHunter_08 Jun. 02 23.12It will show a rule about Block access to these Web destinations. If no need to add other rule, please directly click “Next >” button
ScreenHunter_09 Jun. 02 23.12Malware and HTTPS Inspection
In Malware Inspection Settings, selecting “Yes, inspect Web content requested from the Internet” and “Block encrypted archives…”  for scanning HTTP content requested from Internet.
ScreenHunter_10 Jun. 02 23.13In HTTPS Inspection Settings, select “Allow users to establish HTTPS connections to Web sites” and “Inspect HTTPS traffic and validate HTTPS site certificates” option for let TMG can scan HTTPS traffic.
ScreenHunter_11 Jun. 02 23.13In HTTPS Inspection Preferences, select “No, do not notify users of HTTPS inspection” option if HTTPS traffic is inspected and “Use a certificate automatically generated by Forefront TMG” option for generating the HTTPS inspection certificate.
ScreenHunter_12 Jun. 02 23.14Web Caching
Due to this TMG is not a member of a Windows Active Directory Domain, it just only selection for us to choose “I will manually export and deploy the certificate” for deploying HTTPS inspection trusted root CA to the client computers.
Please click “Browse…” button for where is the exported certificate location.
ScreenHunter_13 Jun. 02 23.15Choose the right location as “My TMG 2010” and assign a file name as “https inspection trusted root CA” next to click “Save” button
ScreenHunter_15 Jun. 02 23.19Click “Next >” button if the certificate path and name is right.
ScreenHunter_16 Jun. 02 23.20In Web Cache Configuration, I want to enable the default Web caching rule so that need to create Cache Size by click “Cache Drives…” button
ScreenHunter_17 Jun. 02 23.20Select “Drive C:” and write down Maximum cache size(MB) “1024” next to click “Set” button
ScreenHunter_18 Jun. 02 23.21You will see Cache size has value “1024” now. Click “OK” to exist this setting.
ScreenHunter_19 Jun. 02 23.21Click “Next >” button to complete Web Cache Configuration.
ScreenHunter_20 Jun. 02 23.21Until now, we have already complete the Web Access Policy Wizard”.
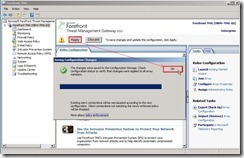
ScreenHunter_21 Jun. 02 23.22Finally, we need to save changes and update the configuration by clicking “Apply” button.
ScreenHunter_24 Jun. 02 23.46The Firewall Policy will define some policy based on the above setting now.
ScreenHunter_26 Jun. 02 23.47

<<< Install Microsoft Forefront TMG 2010 (part 2 of 3)

Install Microsoft Forefront TMG 2010 (part 1 of 3) >>>


2012年6月8日 星期五

Install Microsoft Forefront TMG 2010 (part 2 of 3)

Last article, I have already finish Software installation based on role selection and assign the internal network adapter. In the moment, I will continue to do the related configuration.

Network Settings
Click “Start” –> "Forefront TMG Management” to launch “Getting Started Wizard”
ScreenHunter_12 Jun. 01 18.46In Getting Started Wizard, click “Configure network settings”
ScreenHunter_02 Jun. 01 15.15Click “Next >” button
ScreenHunter_03 Jun. 01 15.21Select “Edge firewall” option next to click “Next >” button
ScreenHunter_06 Jun. 01 15.23Select the Internal network adapter next to click “Next >” button
ScreenHunter_07 Jun. 01 15.53Select one network adapter to connect to the Internet and “Obtain an IP address automatically” option next to click “Next >” button. In the moment,the alert message will show up and tell us the suggestion --- Use a static IP for a more secure configuration. Due to the selection is right for me, I decide to ignore this alert next to click “OK” button.
ScreenHunter_10 Jun. 01 15.57Click “Finish” button to complete the network setup wizard.
ScreenHunter_11 Jun. 01 15.57Now we will continue to configure system settings

System SettingsIn Getting Started Wizard, click “Configure network settings”
ScreenHunter_13 Jun. 01 20.38Click “Next >” button
ScreenHunter_14 Jun. 01 20.39Click “Next >” button if host identification is exact.
ScreenHunter_15 Jun. 01 20.40Click “Finish” button to complete the system setup wizard.
ScreenHunter_16 Jun. 01 20.44Now we will continue to define deployment options.

Define Deployment
In Getting Started Wizard, click “Define deployment options”ScreenHunter_17 Jun. 01 20.44click “Next >” button
ScreenHunter_18 Jun. 01 20.44Select “User the Microsoft Update service to check for updates” option next to click “Next >” button
ScreenHunter_19 Jun. 01 20.45In the NIS and Web Protection selection, it will depend on whether you need this function on TMG. In the moment, I will enable NIS and Web Protection by default next to click “Next >” button.
ScreenHunter_01 Jun. 02 23.00In the configuration of Signature Set Update and New Signature Set, it still depend on your decision. I still select recommended option next to click “Next >” button.
ScreenHunter_02 Jun. 02 23.08Select a feedback option next to click “Next >” button
ScreenHunter_03 Jun. 02 23.08Select your level of participation next to click “Next >” button
ScreenHunter_04 Jun. 02 23.09Click “Finish” button to complete the Deployment Wizard
ScreenHunter_05 Jun. 02 23.09Until now, we have already finish Getting Started Wizard.
ScreenHunter_06 Jun. 02 23.10In next article, we will continue to run the Web Access Wizard.

<<<  Install Microsoft Forefront TMG 2010 (part 1 of 3)
Since 2010 Design by Davidwa
©Copyright Davidwa Inc. All rights reserved.