The RSA key is the private encryption key that it can encode/decode sensitive information.
For enhancing security to access cloud server, we will use a public/private key pair on securing SSH channel. That is a public key is placed on cloud server and a private key is located on personal computer. So does that it will deny password-based authentication on SSH access.
How to do it ?
To generate a SSH Key Pair on Windows platform
For creating a SSH Key on Windows platform, we can download the “PuTTY & PuTTY Key Generator” source from PuTTY Download Page and install these utilities on Windows Platform.
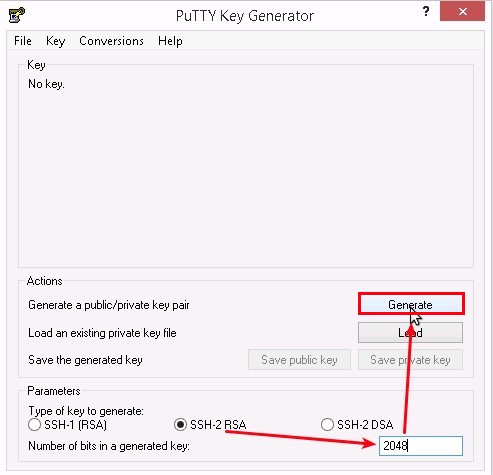
Once the installation completes, we will launch PuTTYgen tool, select the type of key (# 1) and set the number of bits as 1024,2048… bit encryption next to click Generate button for generating a public/private key pair.
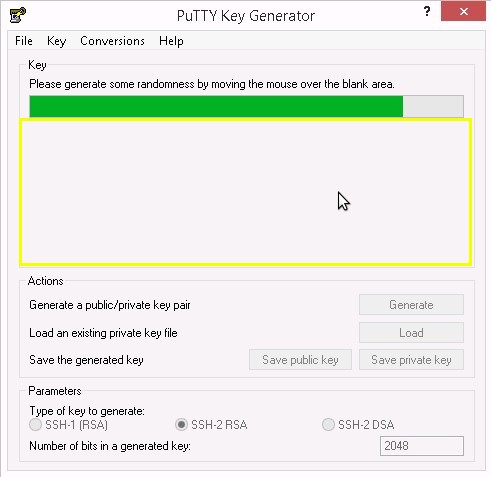
In the key generation process, we need to move the mouse over the blank area (as yellow area) for making some randomness.
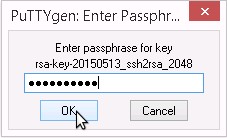
When the key generation completes, we may customize the key comment and set the key passphrase for security.
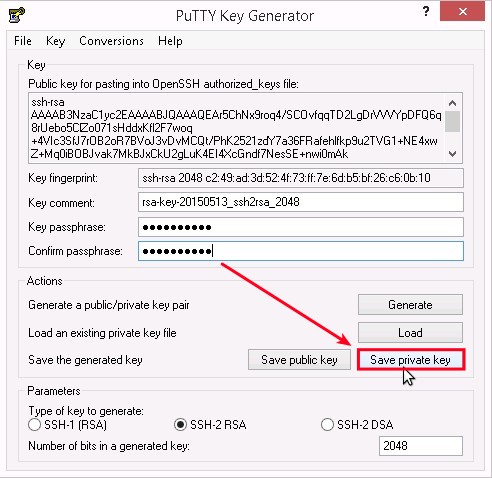
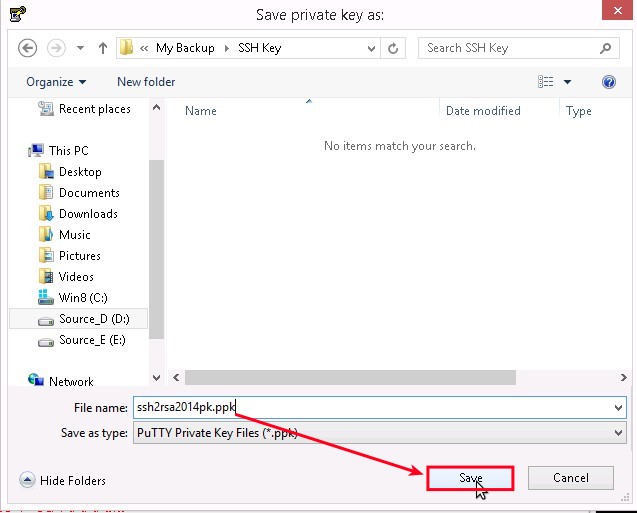
Of course, we should save a public/private key on safety location by clicking Save private key and Save public key button.
To generate PuTTY key (PPK) on Windows
On Windows Platform with PuTTYGen, we can launch PuTTYGen and click Load button for browing/opening the location of the existing private key file (.ppk extension).

If there is the passphrase setting, it will prompt to type in the password.
In the menu, we will click the “Conversions” and “Export OpenSSH Key” option next to type/save a filename for the private key.

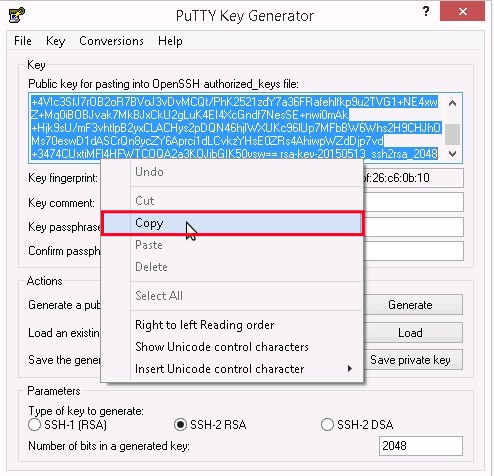
As to the public key, we will directly copy/paste the following content and save as a filename.
To convert PuTTY key (PPK) to OPENSSH key (SSH) on Lubuntu
On Lubuntu/Ubuntu, we will use the PuTTY tools for converting key so that it will be installed by using the sudo apt-get install putty-tools command at the terminal prompt. (# 2)

Then we will copy a private key pair on /tmp from Windows to Linux and prepare to convert the public key by typing the puttygen privatekeyfilename.ppk -o id_rsa.pub -O public-openssh command at the terminal prompt.
To convert private key by typing the puttygen privatekeyfilename.ppk -o id_rsa -O private-openssh command at the terminal prompt.
After finish the above convertion, we will move these keys to ~/.ssh and make sure the permissions are set for the private/public key by typing the following command.
mkdir -p ~/.ssh
mv -i ./id_rsa* ~/.ssh
chmod 600 ~/.ssh/id_rsa
chmod 666 ~/.ssh/id_rsa.pub

To convert RSA key(SSH) to PKCS12 certificate(PFX) on Linux
If we only have a RSA key on Linux, we firstly need to generate a PEM certificate by using the openssl req -new -x509 -key id_rsa -out id_rsa.pem command.

After fill in the interactive item, we will generate a PFX by using the cat id_rsa id_rsa.pem | openssl pkcs12 -export -out id_rsa.pfx command.

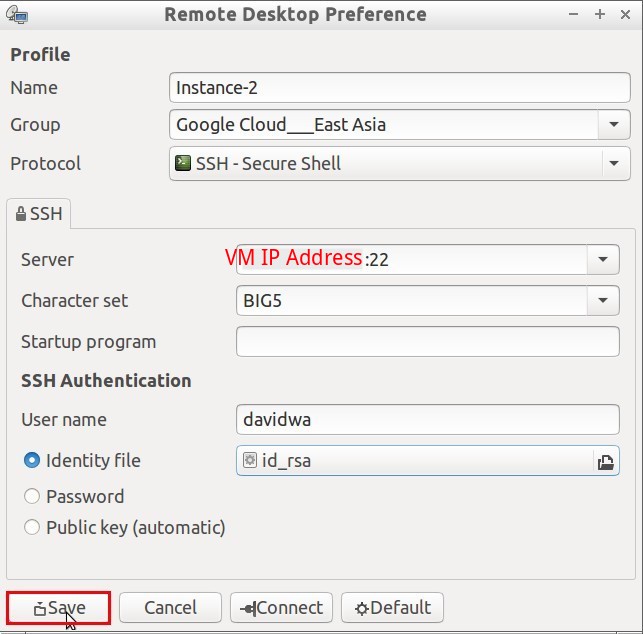
To set up the private key on Remmina Remote Desktop Client
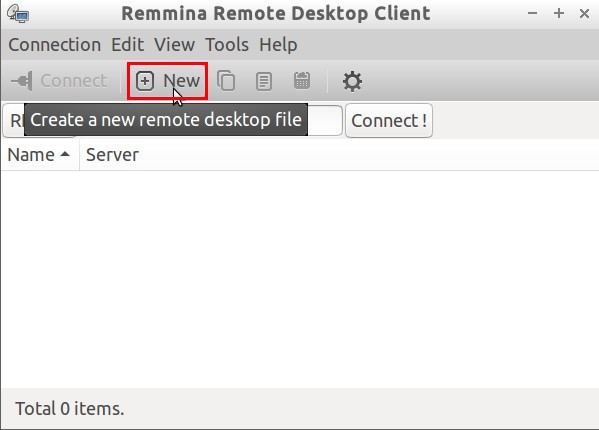
Please open Remmina and click New icon for creating a new remote desktop file.
In Remote Desktop Preference dialog, we will write down some information as Name, Group, Server, Character set, User name and so on. The connection protocol need to choose “SSH - Secure Shell” due to we will contact Linux platform. As to SSH Authentication, we will choose “Identity file” option because a private/public key pair will be used in the connection

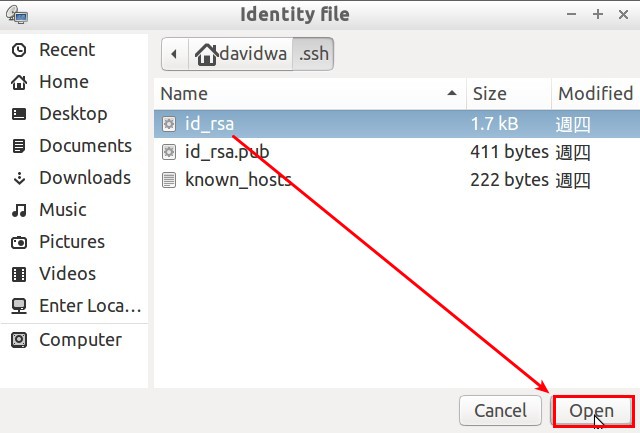
In the moment, we will choose a private key from ~/.ssh folder that its source is from convert PuTTY key (PPK) to OPENSSH key (SSH).
Finally, click Save button for keeping this Remote Desktop profile.
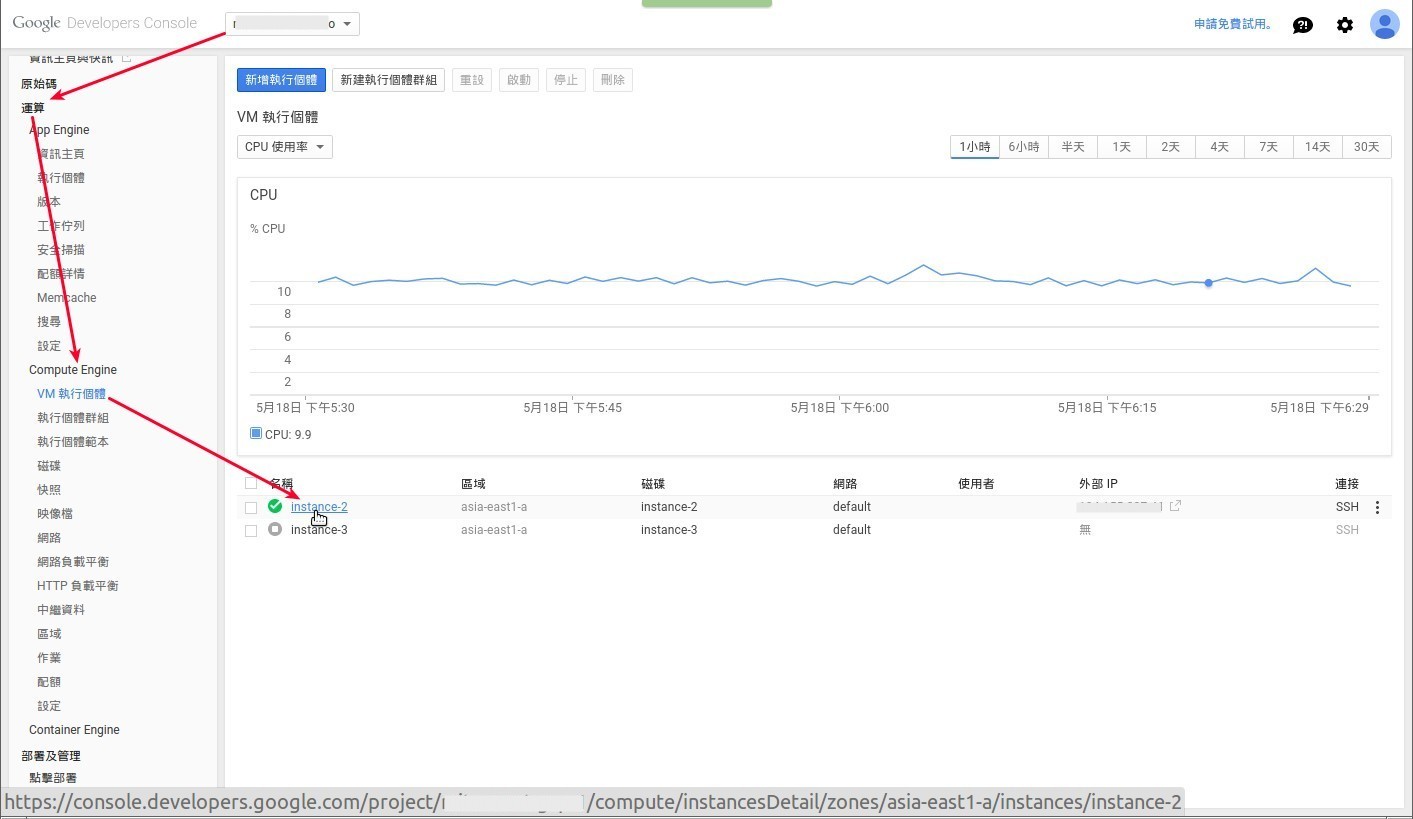
To insert the SSH keys on Google Cloud Engine
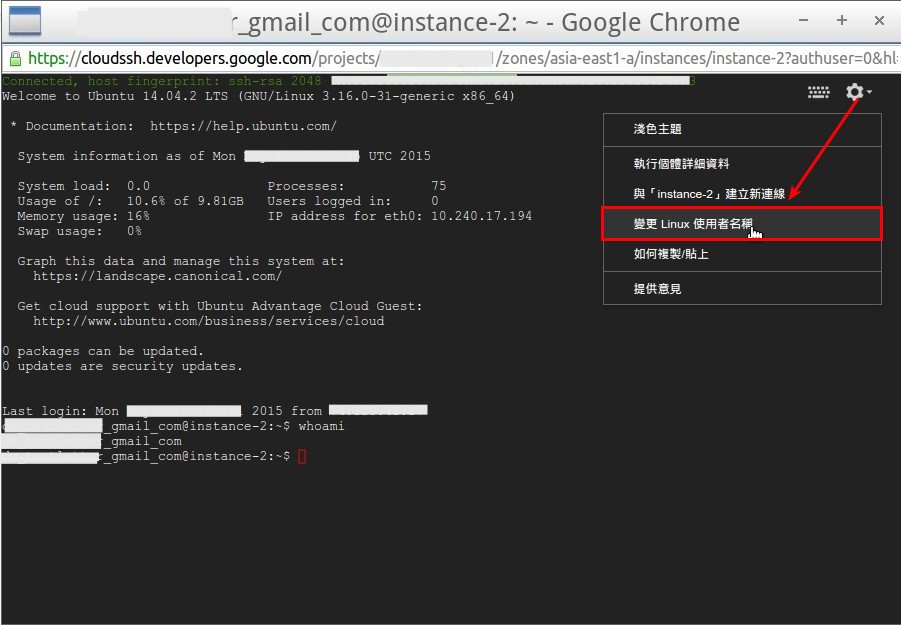
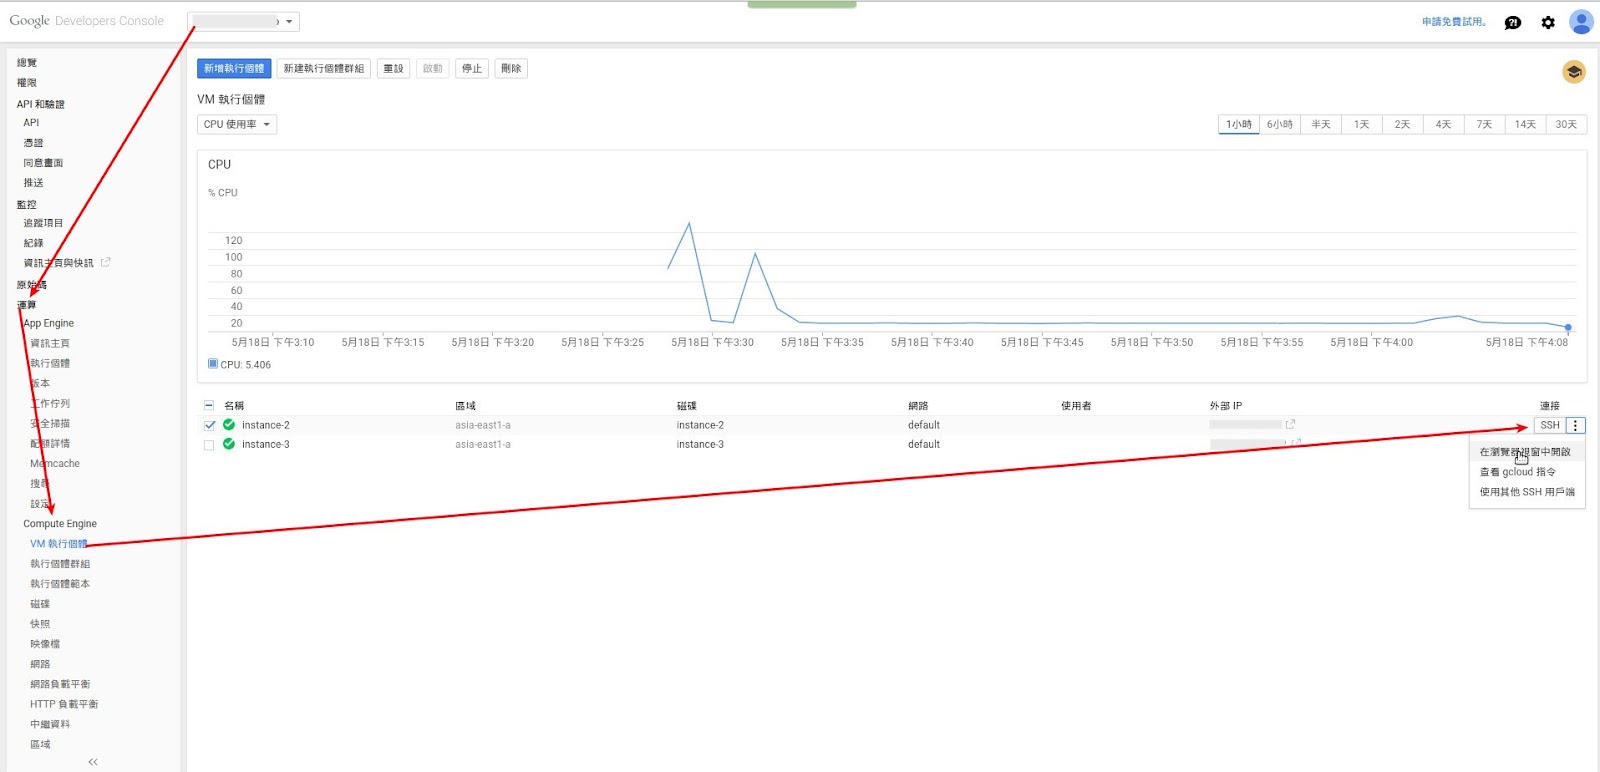
To login Google Developers console and choose the project, we will click Compute -> Compute Engine -> VM Instance and choose a specific Instance for inserting the SSH key to the instance-level metadata. (# 3)
In SSH Key section, click the Add SSH Keys link
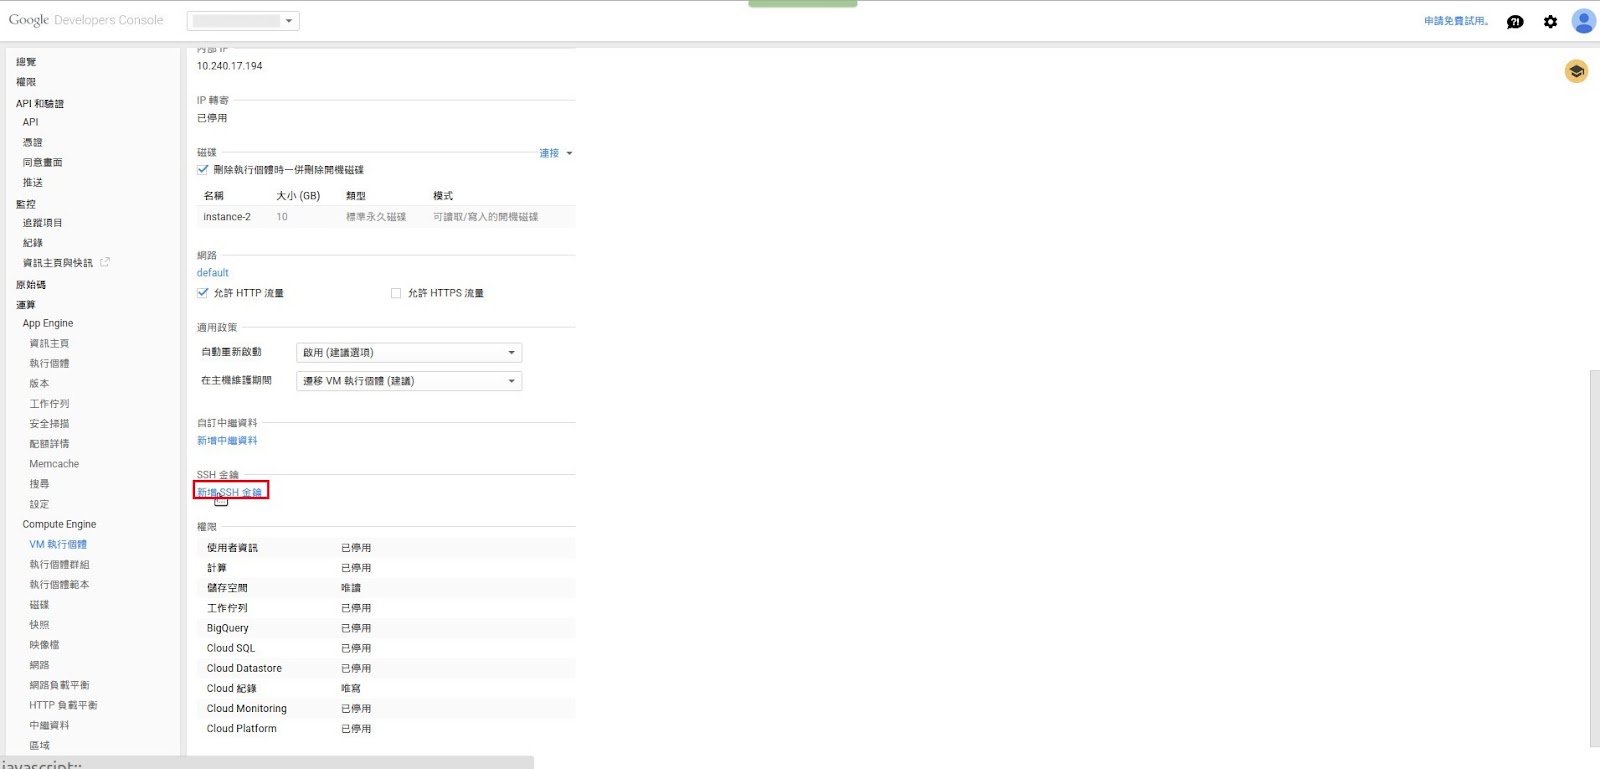
and open the public key file and copy/paste the content on the ssh key textbox next to save this change.
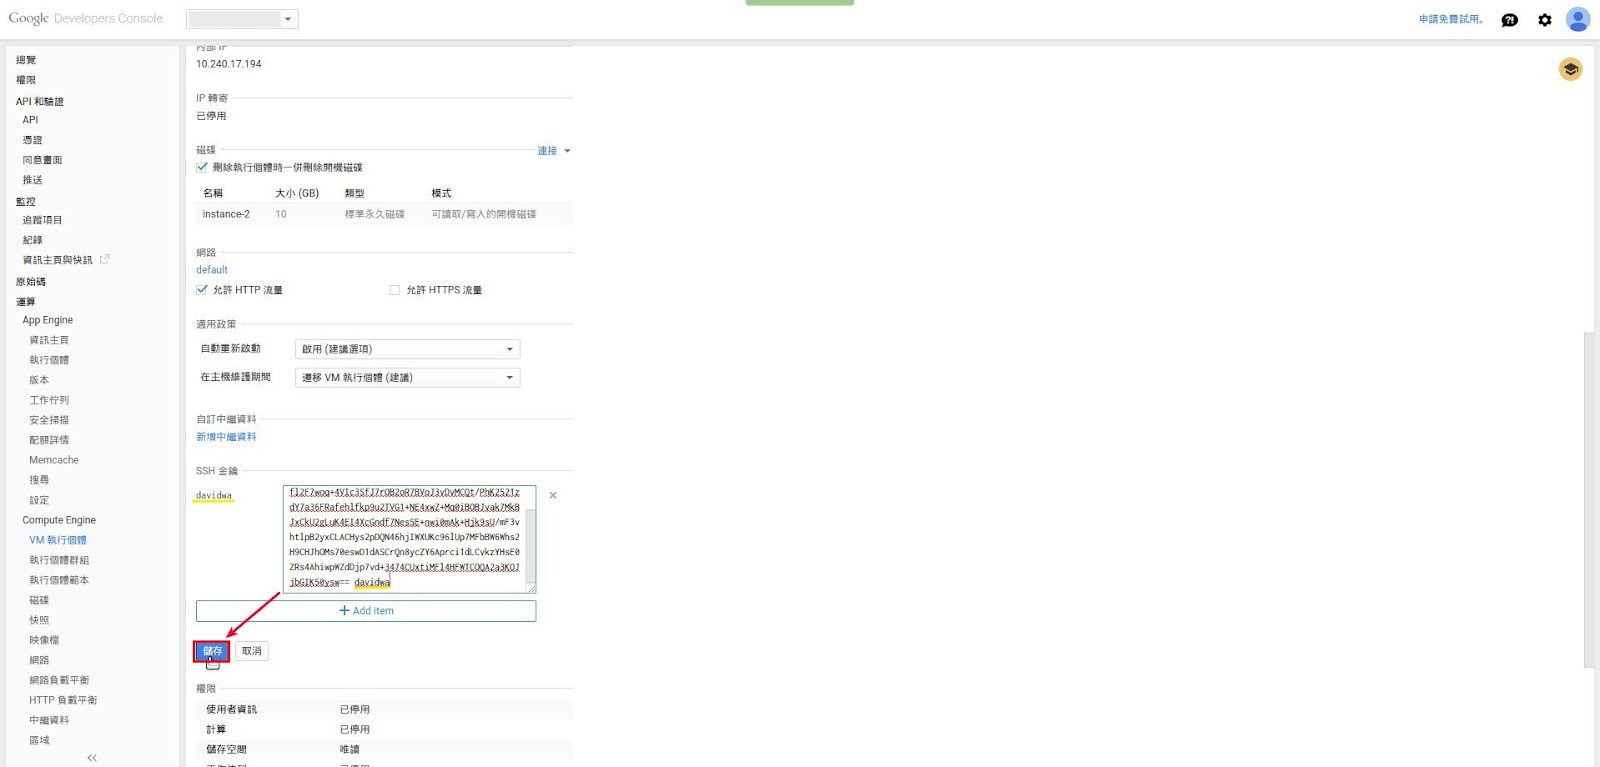
Please notes the format in the ssh key textbox is “ ” or “ @ ” (# 4)
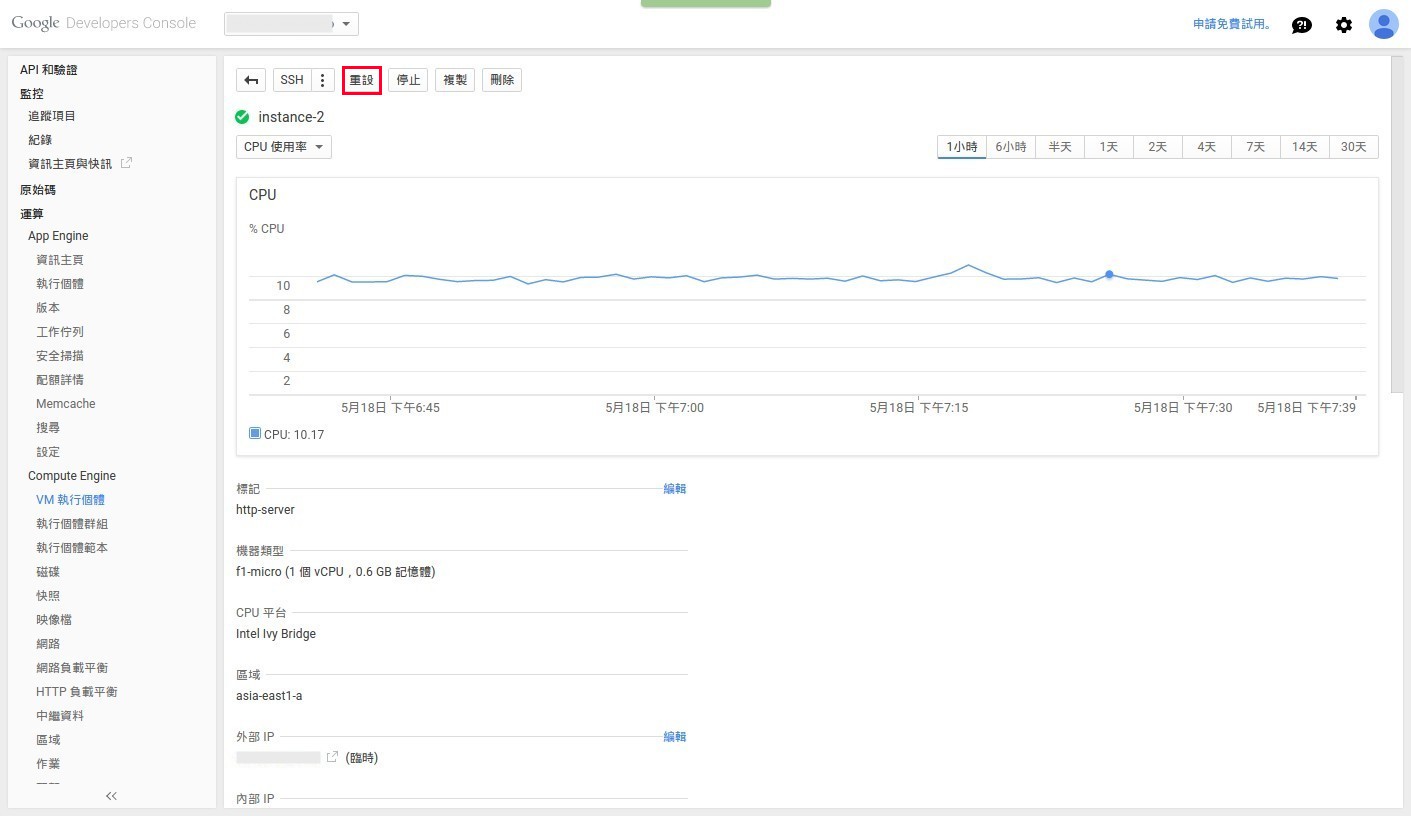
Once the key is inserted into the instance, we need to reset this VM by clicking Reset button.
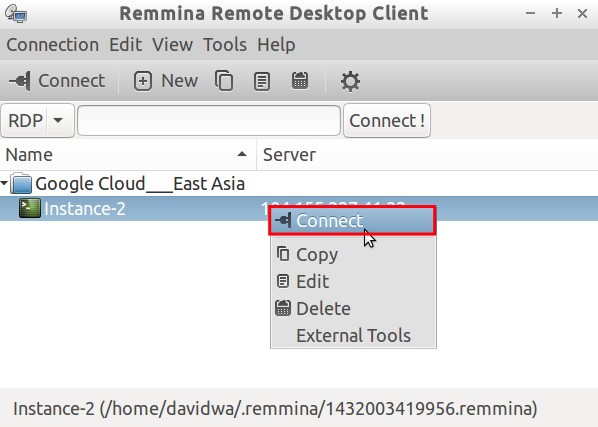
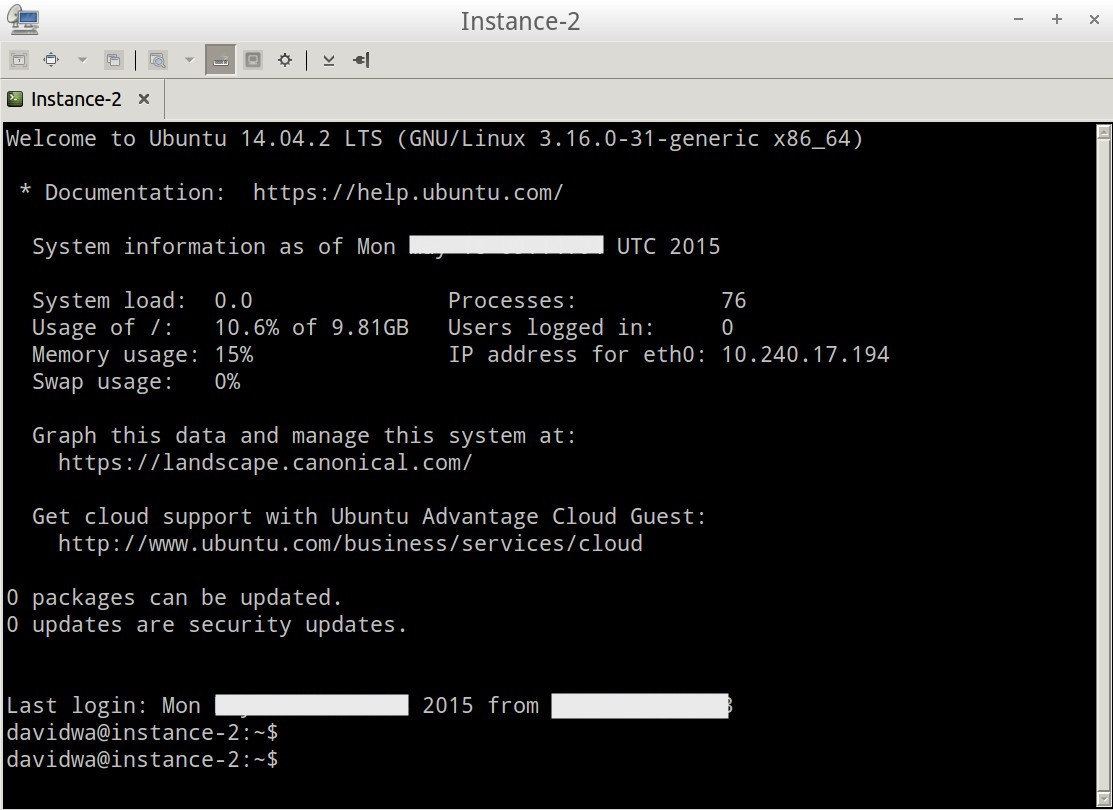
To wait a moment, we will connect this VM with SSH Keys by Remmina Utility.
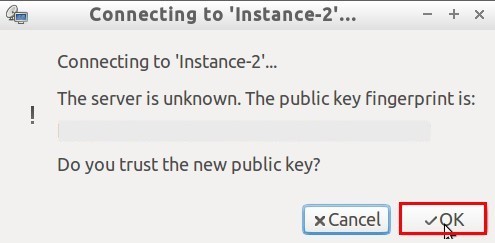
We have to trust the new public key when we conect to VM at the first time.
To key in the passphrase of the private key
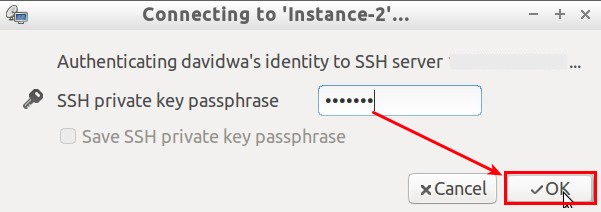
So do that we will log in the Ubuntu console now.
To insert the SSH keys on Microsoft Azure
There is some method to upload/insert SSH key for authentication.
In creating a Linux VM process, we can enable “UPLOAD COMPATIBLE SSH KEY FOR AUTHENTICATION” checkbox and select a certificate file with extension .pem or .cer format.

If a public key has already existed on local client, we can add the content of local client’s ~/.ssh/id_rsa.pub to the Azure VM’s ~/.ssh/authorized_keys by using the ssh-copy-id -i ~/.ssh/id_rsa.pub @ -p

If there is a public key on local client, we will directly copy the id_rsa.pub content from ~/.ssh folder on local client and save as a authorized_keys filename on remote Azure VM.
The related permissions are set for a authorized_keys by typing the following command.
mkdir -p ~/.ssh
chmod 700 ~/.ssh
chmod 600 ~/.ssh/authorized_keys

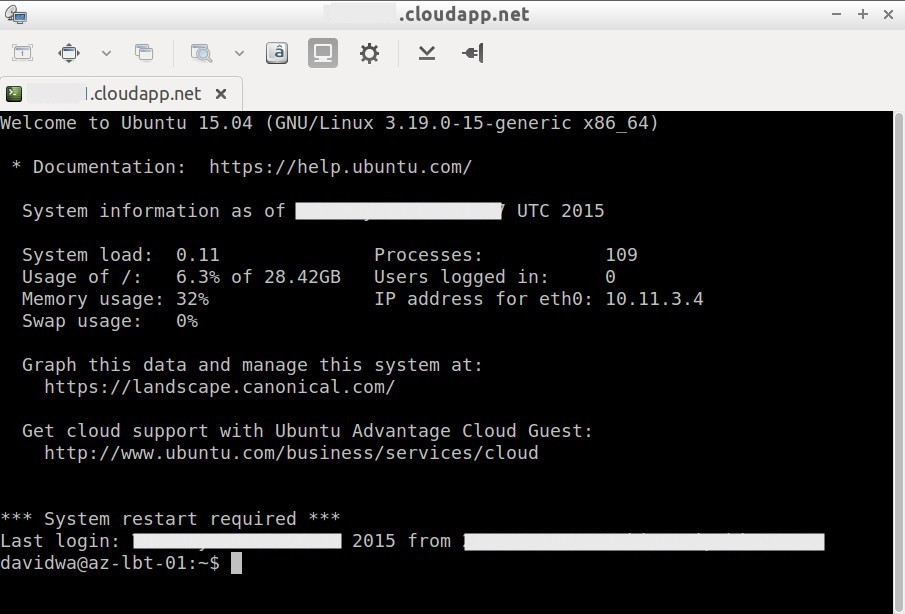
Once the public key is installed on Azure VM and the right permission is set, the SSH access will be granted with no password now.
At this point, we should lock this account for password authentication by using the passwd -l command.
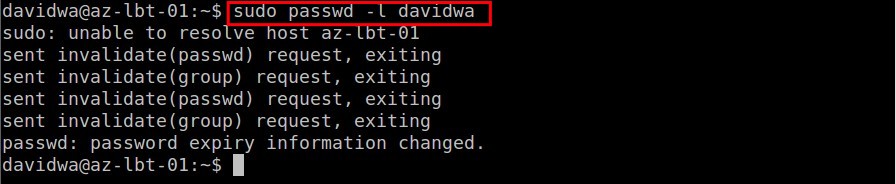
So does that the key authentication will still be possbile but the password authentication will fail now.

Reference:
(# 1) For Key compatiblity, pleaes select the SSH-1(RSA) type if the private key will want to use on other SSH Client as OpenSSH in the future.
(# 2) If we ever generate a pubic key by PuTTYGen on Windows platform, we can copy/pase this file to /tmp location on Linux platform next to do the ssh-keygen -i -f /tmp/publickeyfilename > /tmp/id_rsa.pub command.
(# 4) At first, we will connect with SSH into an instance from the browser by selecting Compute -> Compute Engine -> VM Instance -> SSH in the Google Developer Console.
By default, a username generated from the email address logged into the account. In the moment, we will change the default username by clicking the Setting icon and select Change Linux Username