網頁

2017年10月8日 星期日

Lubuntu 16.04 --- The Fcitx-Chewing input method cannot show the Chinese fonts.

Due to the Lutuntu 16.04 install process select the Englisht language, my system language is in English by default. If want to install the additional language as Chinese character, we need to launch "Language Support" item as follows:

At first, the keyboard input method switch to the "fcitx" mode based on the personal behavior.

When click "Install / Remove languages ..." button, we can select the prefer language as "Chinese Traditional" to be installed.

Note:
If the language support is trigger in the first time, the system will directly tell us that the language support is not installed completely and ask us whether want to install them now.

After install and reboot, we will choose the right language next to log on the system.

In the moment, the system will ask us whether will change the language of the profile folder to the current "new" language? By you decide!

To click the Penguin icon for configuring "fcitx" input method.

Add "Fcitx-Chewing" to the current input method.

When switch to Fcitx-Chewing mode and want to key in Chinese font by document editor, we find out the input screen is blank and cannot show any words.

By searching the Google, we find out maybe kill "fcitx-qimpanel" process can resolve this problem. It it is true by doing "killall fcitx-qimpanel" command next to key in the Chinese font again, we will disable "fcitx-qimpanel" fucntion when the system boot by doing the following process.

Reboot and log on again for verify whether the problem can be resolved.

If the problem still exist, maybe need to install the "Qt Quick" module

Reboot again and almost the blank screen will be resolved.

Lubuntu 16.04 -- How to Join Microsoft AD domain by using Power Broker Identity Service Open Edition.

In general, we know the linux platform join to Microsoft AD domain by using the Samba package. But the related process need to be done very much. Wether has the alternative package can do the same action?
The following introduction will express that the Lubuntu 16.04 join the Active Directory domain by using the Power Broker Identity Service Open Edition.


AD Environment
*MS Windows Server 2016 Domain Name: corpnet.lab
*Domain admin username: administrator
*Domain user username: test1


Linux Environment
*Linux Platform: Lubuntu 16.04 x64
*Linux admain username: davidwa


[pre-requisite]
**Update Lubuntu
$ sudo apt update
$ sudo apt dist-upgrade

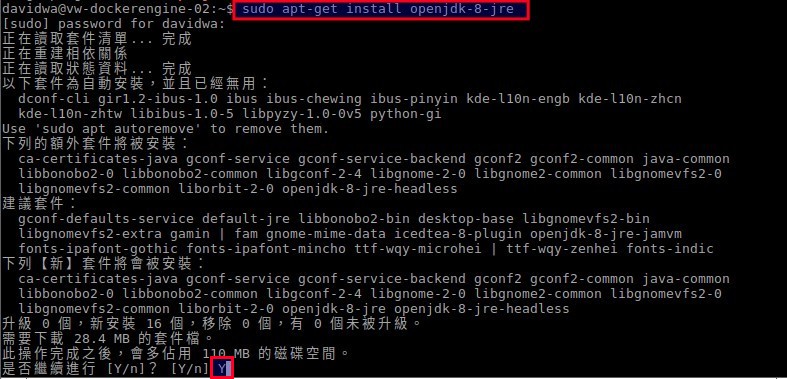
For launch PBIS GUI, we need to install the following package.
$ sudo apt install libglade2-0
擷取選取區域_007

$ sudo apt install ssh
擷取選取區域_008


[Install PBIS software]
To download the latest stable version of the pbis-open file based on the self-platform from GitHun as https://github.com/BeyondTrust/pbis-open/releases
擷取選取區域_001

In the terminal shell, switch to the download path as cd ~/Downloads and set the executable permission by run sudo chmod +x pbis-open-***.linux.x86_64.deb.sh command
擷取選取區域_002

To install the pbis-open package by run sudo ./pbis-open-***.linux.x86_64.deb.sh command
擷取選取區域_004


[Use PBIS-Open Package to join the workstation to the Windows Domain]
After installing,it will pop up a dialog about domain join windows. If not, then later enter sudo /opt/pbis/bin/domainjoin-gui command to show a GUI-based domain join tool as well. (# 1)

When prompted for a password supply the appropriate credentials,
擷取選取區域_012

we will receive a "SUCCESS" prompt when finished and automatically set the FQDN in the /etc/hosts file.(# 2)
擷取選取區域_015
擷取選取區域_016


On Lubuntu/Ubuntu computer, we will swith to the location of the domain join command-line utility and execute the command for joining the current machine into an AD domain. (# 3)
$ cd /opt/pbis/bin/
$ sudo domainjoin-cli join "DomainFQDNName" "DomainAdminAccount"
or
$ sudo domainjoin-cli join "DomainFQDNName" "DomainAdminUPNAccount"

*where
"DomainFQDNName" = the FQDN of the Microsoft Active Directory domain as ad.com
"DomainAdminAccount" = domainuser  with the permission that join computer to domain
"DomainAdminUPNAccount" = domainuser@domainFQDNname


EXAMPLE:
$ sudo su
$ domainjoin-cli join corpnet.lab administrator


[Set-up default configuration for domain users]
To set the PBIS environment for all domain users that will be logon the system.
$ sudo /opt/pbis/bin/config UserDomainPrefix LAB
$ sudo /opt/pbis/bin/config AssumeDefaultDomain true
$ sudo /opt/pbis/bin/config LoginShellTemplate /bin/bash
$ sudo /opt/pbis/bin/config HomeDirTemplate %H/%U
$ sudo /opt/pbis/bin/config RequireMembershipOf "LAB\\domain^users"
$ sudo /opt/pbis/bin/ad-cache --delete-all
$ sudo /opt/pbis/bin/update-dns

*where
LAB = Domain Name
domain^users = Domain Users Security Group
擷取選取區域_019

[Integrade with Samba]
If we want to use a Linux Samba server that is integrated with AD using PBIS
$ sudo apt install samba
擷取選取區域_021

$ sudo /opt/pbis/bin/samba-interop-install --install
擷取選取區域_023


[Disable local resolver]
Note that starting from Ubuntu 14.04 NetworkManager has a local resolver which needs to be disabled
$ sudo nano /etc/NetworkManager/NetworkManager.conf
Find the line that states the following:
dns=dnsmasq
Replace it with:
#dns=dnsmasq
擷取選取區域_026


[Confiure PAM authentication]
From a terminal:
$ sudo nano /etc/pam.d/common-session
Find the line that states the following:
session optional pam_lsass.so
Replace it with:
session [success=ok default=ignore] pam_lsass.so
擷取選取區域_027


$ sudo pam-auth-update --force

enable “Create home directory on login”
擷取選取區域_031


[Edit the lightdm configuration file]
For Ubuntu, edit the lightdm configuration file
$ sudo nano /usr/share/lightdm/lightdm.conf.d/50-unity-greeter.conf
and append the following lines:
allow-guest=false
greeter-show-manual-login=true


For Lubuntu, edit the lightdm configuration file will be:
$ sudo nano /usr/share/lightdm/lightdm.conf.d/60-lightdm-gtk-greeter.conf
and append the following lines:
allow-guest=false
greeter-show-manual-login=true
擷取選取區域_029


[Add AD Domain user to sudoers file]
If we want to give them sudo privileges, we can add any domain users and/or groups to the sudoers file.
From a terminal, edit /etc/sudoers with the following entries
$ sudo nano /etc/sudoers
and append the following lines:
"DomainUserAccount" ALL=(ALL:ALL) ALL
%"DomainName"\\"Domain Users Security Group" ALL=(ALL) ALL
EXAMPLE:
test1 ALL=(ALL:ALL) ALL
%LAB\\domain^users ALL=(ALL) ALL
擷取選取區域_030

restart computer
$ sudo restart


[Verify function]
**logon domain user
擷取選取區域_032
擷取選取區域_025


$ id "Domain Account"
or
$ id "Domain Name"\\"Domain Account"
擷取選取區域_033


**Login linux account
擷取選取區域_034

$ su - "Domain Account"
擷取選取區域_035


Until now, we make sure that this linux platform has already successfully join into the AD domain.


Reference:
(# 1)   If no install "libglade2-0" by executing sudo apt install libglade2-0, we cannot launch the pbis-open gui and will get error message as follows:
擷取選取區域_006

(# 2) If want to join a Linux computer to the domain without changing the /etc/hosts file, we can run the following command as
# sudo su
# /opt/pbis/bin/domainjoin-cli join --disable hostname

(# 3) If we don't install/enable SSH daemon, maybe need to disable ssh module when join the AD domain.
$ sudo domainjoin-cli join --disable ssh "DomainFQDNName" "DomainAdminAccount"
or
$ sudo domainjoin-cli join --disable ssh "DomainFQDNName" "DomainAdminUPNAccount"

* The command usage refer to http://manpages.ubuntu.com/manpages/precise/man8/domainjoin-cli.8.html


2017年5月27日 星期六

ZeroShell 3.6.0 --- How to upgrade the ZeroShell old version(3.4.0) to the latest one(3.6.0)

Thank Fulvio develop/share the ZeroShell package for everyone!
It will help me to do some testing in the simulated environment because its function is as Router role.

For security and enhanced function, sometimes we hope to install the new release as the next version and Add-on packages. So we have to require a activation key by doing some process(# 1) next to send the Feature Code to activation@zeroshell.net for receiving the related Activation Key.
I am lazy for requesting an Activation Key and just do it on virtualization Lab, I think maybe there is some method to do the upgrade process. That is the configuration is backup from the old version next to restore to the new version but need to install the newest software at first.

How to do it?
(1).Install the newest ZeroShell software by following the previous article
(2).Backup the configuration from the old ZeroShell version
(3). Restore the configuration to the newest ZeroShell version
(4). Active the imported profile
So do that we can use the newest ZeroShell version as before on Lab now!

Reference:
(# 1)   How to obtain a key       

  • Put a link and description about Zeroshell on your website
  • Post your positive/negative experiences with Zeroshell on external forum/blog
  • Make a small donation with PayPal by clicking the image below  

  • (# 2) The above procedure still is compatible with the 3.7.1 version.

    2017年3月13日 星期一

    JMeter 3.1 --- how to install JMeter 3.1 with OpenJDK on Ubuntu/Lubuntu 16.10

    JAVA is necessary to run certain applications in Linux and windows machine. JAVA comes with two packages (JDK & JRE). JDK stands for (Java Development Kit) which helps developers for developing, debugging, and monitoring Java applications.

    JRE stands for (Java Runtime Environment) which deploys Java applications on servers.It includes tools for JVM monitoring and tools commonly required for server applications. Many of us needed only JRE, so make sure you have installed JRE not for JDE.

    In this article i’m going to explain how to install OpenJDK in Linux such as Ubuntu based systems.

    1) Search OpenJDK Packages
    Use the below commands to search available java version on your distribution to install further.

    2) Install JAVA (OpenJDK)
    We have found the list of available JAVA version on Linux distribution in above step. Use the following commands to install required java (OpenJDK/JRE) version on your system through the package manager.
    Install JRE - Java Runtime Environment

    Install JDK - Java Development Kit


    3) Verify JAVA (OpenJDK) Version
    After successful installation of Java, use the following command to verify the installed version of JAVA on your systems.

    4) Setup JAVA Environment Variables
    We should Setup JAVA Environment Variables for java because all the java based application uses environment variables to work. Open your .bashrc file and add the below lines to end of the file. Make sure you need to mention your path instead of us, then Save and exit.

    After saving .bashrc file, run the following command to make it work.
    Now, check the environment value using below commands. Its clearly fetch the path of jdk and jre home.

    5) Download Latest Apache JMeter Binaries
    We will download the latest version of JMeter from http://jmeter.apache.org/download_jmeter.cgi

    6) Extract JMeter Archive into /tmp
    $ tar xvzf ~/Downloads/apache-jmeter*.tgz -C /tmp/

    7) Installing JMeter
    $ sudo mv /tmp/apache-jmeter* /opt/apache-jmeter
    $ sudo ln -s /opt/apache-jmeter/bin/jmeter /usr/local/bin/jmeter

    8) Launching JMeter
    $ sudo jmeter
    Finally, the JMeter software will appear on the screen.
    Since 2010 Design by Davidwa
    ©Copyright Davidwa Inc. All rights reserved.